Reflection

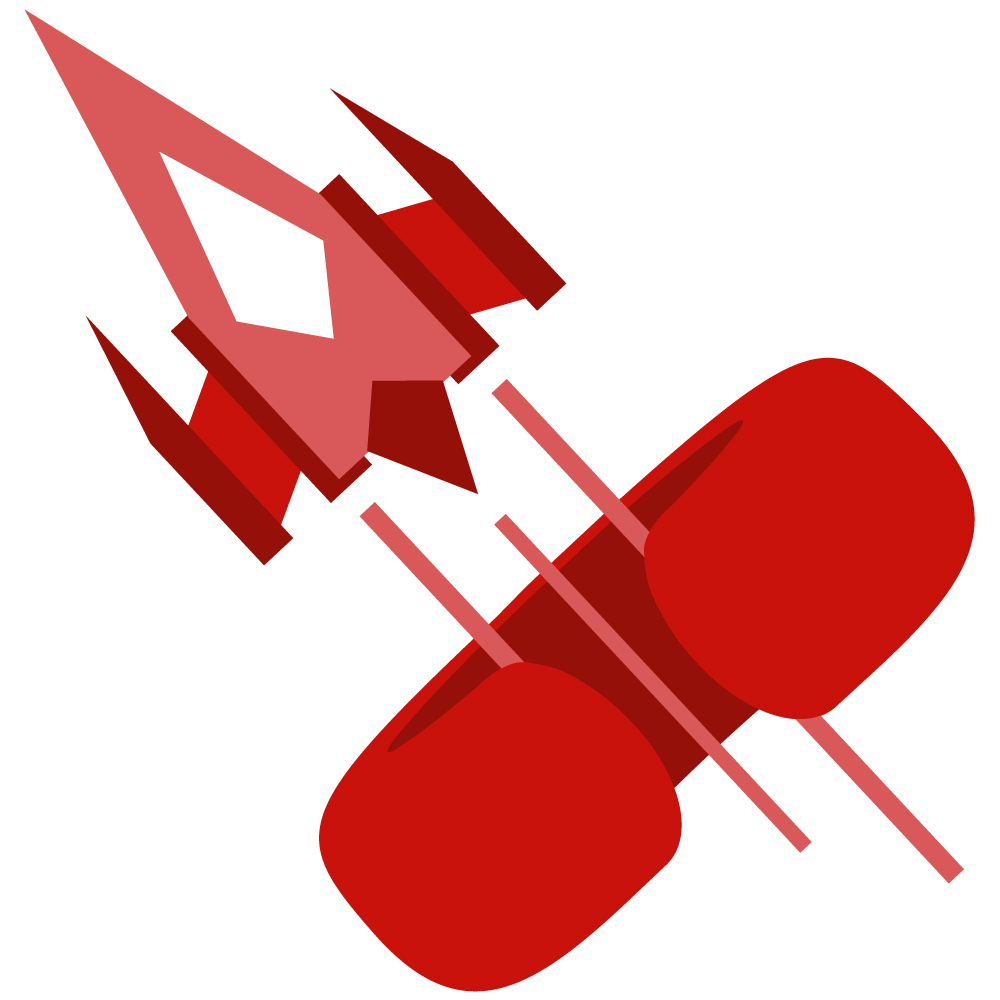
Looking back on this class in the semester, I actually really enjoyed a lot of our projects that we did. If I had to narrow it down however, I think the Premiere and Illustrator projects were my absolute favorites, mostly because I found these two to be skills I’ve been wanting to get more practice in for while simultaneously doing topics that I felt benefited creations I personally wanted to do at the same time. The Audition and Photoshop projects were great as well and filled a same role as just described, but the Premiere and Illustrator ones really took the cake for letting me get my hands dirty to attempt to make a personal logo and make video content that I would like to continue doing.

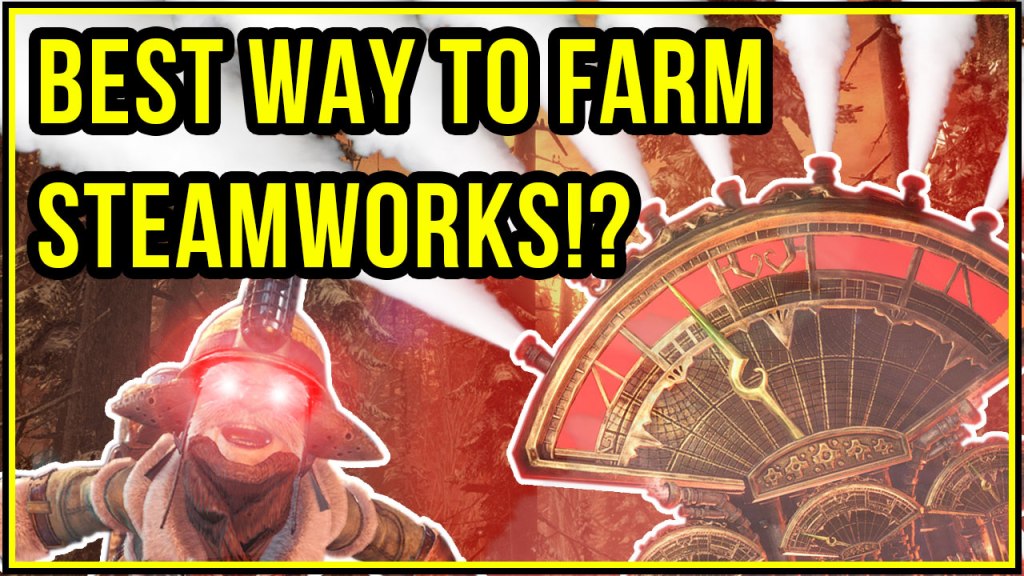
Coming as a senior DTC student, I’ve grown pretty familiar with all of the software we wound up using in this class. That said, I found myself learning so much in this class as a fantastic refresher course, reminding me of the ins and outs of the software I had gotten foggy about, as well as discovering new techniques I was unaware of. The skills that I got further knowledge in that I can definitely see myself using was mostly from Photoshop if I had to pinpoint. Its always been one of my least-used Adobe software, and going through the whole process of making a Youtube thumbnail let me discover the software in a new and fascinating way that was really fun for me.

Again, as I’m about to wrap up my academic career here at WSUV in a few weeks, I still see myself in the video games industry as a 3D artist, but with the tool belt to do so much more. Having a good grasp on the Adobe Suite is essential for any creative career path. The skills I’ve learned in this class for Photoshop and Illustrator will be key to doing texture work in Maya, Audition for any sort of game SFX, and Premiere an d general video editing for pulling in audiences and advertising my work.

As for skills that I wish I could have learned in this course, I think I would’ve loved to maybe explore the effects you could use in Audition to help further your audio editing skills. Learning as a class on what equalizing, reverb, and mixing and such to a better degree would’ve been fascinating, as audio always seems to be glossed over in these creative classes, despite being such an important role in most mediums.

The resources I found most important over my time in this class were from sources I found to be inspirational. Youtubers, anime clips, my friends’ works, and anything of the sort, are a huge boon for me to learn. Breaking down what these people do and trying to simulate them and learn from their techniques and styles is what gets me wanting to learn more about software.

I won’t lie, I walked into this class wanting to fill up some of my electives, and I saw this class was teaching things I was already familiar with and could kind of use it as a means to brush up my skills right before leaving college. However, what I got in the end was a class with such amazing creative freedom, that I found myself not just wanting to sharpen my claws, but to go further beyond and really make things I wanted to make for fun. So thank you for that. It’s been a fantastic bridge to demonstrate what I know, learn a few new tricks and tips that’s relevant to me, and to go and make content that I’m proud to be making.

Thanks everyone!

Premiere: Final

Idea and Inspiration

With the final iteration of our Premiere project, I wanted to create (at least with the time allotted) a demo for what I would consider the goal of video game Youtube content I would like to continue creating in the future. While this format would be better suited for maybe 5 to 10 minute videos to give a little more breathing room, I figured I would try my best in the 2 minute allotted time period. I just want to share what I love: how I make and play video games.

I was inspired by a few other Youtubers that make content similar to this one above: Arekkz Gaming, Datto, TrueVanguard, Drewsky, Cammycakes; they all like to chime in with their audience and share how they’re playing their games.

I started my design process by creating a storyboard of what I loosely wanted to get across, coupled with a script to record my voice too. I spent some time with friends getting good footage in-game of Monster Hunter World: Iceborne for both content and b-roll. Lastly I chose a song I thought would fit from my backstock of unused songs over the years and brought this all into Premiere.

Technical Detail

I used GeForce’s capture feature on my PC to collect all the direct footage from my game, as well as utilizing the camera capture features in-game built for such occasion. Once in premiere, I sliced up the footage as we did in our tutorials: grabbing clips from raw footage as video-only, and dragging them into the timeline of my sequence. I did this all to my script that was also edited in a similar format, using the razor tool to rid of any unwanted audio and stitching all the good stuff back together. With both audio and video in order, I then cropped my song to fit as I pleased.

The single piece of feedback I got was due to the nature of cramming this all into a 2 minute video, I wound up speaking too fast (and not always the most clear at times as well). I figured adding some captions to the video that helped break up my voice into large, readable sections, could help the viewer “follow the bouncing ball” and help mitigate my shortcomings. I also EQ’d my voice a little to help with muddiness hopefully. Other than that, the only techinical difficulties I came across in the project was largely re-recording, finding my earlier recordings not usable once they came into Premiere due to the pace of me speaking or mumbling.

Sources and Materials

All game capture, script, editing, and music were created/recorded by me.

Premiere: Draft

Idea and Inspiration

For our final module project in Adobe Premiere, I wanted create a piece of video game content that shares what I’m actively doing in one of the games I’ve been playing. I wanted to test drive a format that I could possibly evolve and start making more regularly, so this project was a great chance to try. Discussing games, either how I play them or make them, ultimately ties into what I want this blog to be about.

I’ve been inspired by a few other Youtubers that make content on the games they play in a similar format. Arekkz Gaming, Datto, TrueVanguard, CammyCakes, and so forth, all like to chime in with their audience and share how they’ve been playing the game, whether it’s a new way to play or sharing some new insight. That said, I tried to condense a normally 10 minute video format into 2, skipping all the filler and getting right to the point!

My design process started with creating a storyboard of what I wanted to get across, with a rough script shortly after to record to. I then spent a few hours collecting some footage in Monster Hunter World: Iceborne, making sure to get both what I needed visually for the information I wanted to share, as well as some exciting b-roll for filling in the blanks. I chose a song I had made in my back stock of demos and songs that I’ve made and brought them all into Premiere.

Technical Detail

To collect the footage I needed, I entirely used the GeForce capture feature from my Nvidia graphics card, filming direct feed from the game. Monster Hunter World: Iceborne has some built in camera features for doing such things as well, so I utilized these to get panning shots I wanted for my project. Once in Premiere, I first cut up my recorded script, removing any blank space and unwanted noise. After stringing these together in the order I wanted, gather clips from my game capture recordings that fit the narrative visually to match. I decided to ax the game audio so the audience could concentrate on the voice and background music. Speaking of, once the script and video where cut into place, I cut up the backing track to use parts of the songs that I thought would fit the scene.

I didn’t have much technical difficulties in this project thankfully, as basic video and audio editing are some skills I’ve been keen at for awhile now. However, I did end up re-recording my script several times as I found I wasn’t projecting well enough, and some of my sentences at the end would trail off in volume. Adjusting the mic and practicing my script more lead to better, more usable recordings in the end.

Sources and Materials

All game capture, script, editing, and music was created myself.

Audio Story: Final

Idea and Inspiration

As we all know, the COVID-19 situation has rendered many of us stuck at home to practice our social distancing. That said, I had a little rough time finding someone to do an interview with for this assignment while maintaining the level of audio quality I wanted, so I instead opted for a doing a review format.

Since I’m a gaming blog, I really wanted to cover something I’ve been obsessed about the past few months: My new controllers for the Nintendo Switch from the 3rd party company HORI called the Switch Split Pad Pros. Definitely a mouthful for sure.

Design Process

Inspired by quick review format videos you see on gaming site outlets and certain Youtube channels, I thought I could take the format and make it work for me in a purely audio-based form. My thoughts were that this could be something that could be squeezed into a podcast maybe. Either way it definitely proved to be a fun and unique challenge to sell a controller (something which is largely judged by feeling and sight) with pure audio.

Originally I wanted to do a combo of music, narration, and sound effects, but the latter proved to make the entire thing sound much to busy in the end. In addition, most of the sound effects I recorded were mere clicks and clacks from the controller and not adding much to the project. That said, the project as a whole was pretty direct in approach: I typed up a script of what I wanted to say, and recorded the words in my office.

Technical Detail

To dig a little deeper however, my recording process was using my studio mic and Audacity in order to get audio as clean and crisp as possible, usually requiring many takes and rerecording to accomplish. Each rerecord was experimentation with how I projected my voice, how much gain I had going into the input device, and how much distance I was gauging from my mouth to the microphone. For the backing track, I decided to use a song I made as a demo about a year and a half ago that unfortunately went unused. I felt like it really matched the theme and energy I wanted to have in this video and would save me a bit from having to wrangle with creative commons material.

The editing process went pretty smooth for the most part. Audio editing and composition is like my soul craft when it comes to hobbies and really enjoy the entire process of it. I first started jacking up my voice a bit since I’m pretty soft spoken person, using compressors and vocal enhancers to really beef up the range in volume between my words. I cleaned it all up with an equalizer to remove any weird frequencies in my voice, as well as a DeEsser and DeNoise to nuke some of those hard consonants and background noise respectfully.

After that came the tedious process of zooming into the recordings and hand cutting with the razor tool all of the blank space and bad takes. I then bunched up all the floating recordings into a seamless narration in an “ad-like” fashion.

Again the process went pretty smooth over all and the only difficulties were some rerecordings due to some personal level of quality I wanted in my sound, and the omission of using sound effects. After posting to our discussion board for feedback, Cheyenne did give some insight in the backing music being a tad too loud in comparison to my voice, so I adjusted it appropriately.

Sources and Material

All sources used were of my own, including the backing track that I had made a year and a half ago as a demo that went unused.

Tucker, Cody. (2018). “Star-Sliced Summit Demo4.mp3”

Audition Project: Draft

Idea and Inspiration

So unfortunately do the COVID-19 scare, my options became a little limited for interviews as I wanted to keep up social distancing. While I could’ve maybe had a friend record and send their answers as an interview, I don’t think I would’ve been able to retain the quality of audio that I would’ve wished for. So instead, I opted to do a personal review.

To stay related to the gaming blog, I had the idea of doing a quick audio review of a piece of hardware I’ve been enjoying. I’ve been using these 3rd party controllers for my Switch the past few months and they’ve really added to the already awesome experience.

Design Process

I was inspired by those quick videos you could find on IGN and other gaming news outlets, that make quick-stop video reviews on current happenings in gaming. I figured making an audible version of this kind of format might be a fun challenge to see if I could convey the strengths of a product without any imagery.

I originally wanted to do a combination of background music, narration, and sound effects, but the latter proved to make the entire ensemble pretty busy, as well as not really translating well to just sound for a bunch of clicks and clacks from the controller. The process for the whole project was pretty straight forward: just typing up a script of words I wanted to say and recording them in my office.

Technical Detail

To be more in depth about the process, after I had my script ready, I used my studio mic in my office to record my voice and controller in Audacity for the raw footage. Later for this draft, I decided to rerecord my voice once again with a few tweaks to my gain input and distance I was from the mic for a better sound. For the backing track, I decided to use an old demo of a song I was working on a few years ago as I hadn’t really put it to good use before. I felt it fitted the type of emotion and energy I wanted for this project. Again, it was about this point I decided the sound effects weren’t really cutting it and left them on mute.

Once all was set how I wanted in Audition, I got to work on the editing. I’m a pretty soft spoken guy regardless of my gain cranking and basically eating the mic, so I made some adjustments. I added a compressor and vocal enhancer effect to help balance my audio out a bit while also raising its volume. To clean up, I equalized a lot of my wonky frequencies in my voice to make it a bit more clear, as well as using a DeEsser on my hard consonants and a DeNoise to help mitigate any left over background fodder.

From there I scrubbed through my near 5 minutes of audio, using the razor tool to cut before transients and trimming off the fat at the end of my sentence chunks. With the dead space gone, I scooted the floating recordings together in one seamless narration over the course of the two minutes.

Again, the only real difficulties encountered were fitting the sound effects I originally planned. While I recorded separate recordings for button presses, triggers, and attaching and detaching the controllers, they didn’t really translate all too well for just being audio. With them just sounding like a bunch of clicks in the audio, I decided to leave them on mute so the focus could stay on the narration.

Sources and Material

All the sources used were my own recordings. As mentioned, I used a recording of a song I made about a year and a half ago, so I should self credit.

Tucker, Cody. (2018). “Star-Sliced Summit Demo4.mp3”

Audition: Raw Audio Footage

Here’s the collection of raw audio footage I’ll be using in the upcoming Audition Assignment. Keeping the current situation in mind, I don’t have many options for interviews in person, and figured with this being a gaming blog, I could review a controller I’ve been using as of late that I’d love to reach out and share to people about. Along with some of the rough cut narration, I’ve recorded some sound effects from the controller itself, as well as a backing track I’ve created myself.

Tucker, Cody. (2018). “StarSlicedDemo4.mp3.”

Blog Logo: Final

Idea and Inspiration

The goal of this project was to make something for the blog, which is about sharing my gaming hobby of course, but I thought when you remove that layer to it, the blog is really about sharing “me.” That said, it felt right to maybe make a cool new logo that I would be proud to show around for my own brand. Works with the blog too!

So there’s a lot to unpack here as the imagery I chose represents a lot about myself in various ways. The arcade spaceship motif is an obvious nod to my affinity for games and the future I want to have associated with it, but it’s also representative of my passion and influence for all thing sci-fi such as mecha and robot design. The oddly shaped “C” ring is an amalgamation of my first initial and being this abstract 3D shape that both represents my craft in 3D modeling, as well as vaguely resembling headphones for my audio creation. Finally the choices in shape and color are both elements of design that I hold dearly, as most of my creative endeavors strive for high energy and bold shapes.

Design Process

Originally I had a really hard time in the sketch phase of this project. Filling up over ten pages in my sketchbook of all sorts of designs, it was really hard to make something that represented “me” that I was satisfied with. Once I got to this design however, everything sort of clicked and quickly was able to get to this current iteration you see now. After some nice feedback from both my fiance and a classmate, I tilted the logo slightly more to make the “C” a bit more apparent, while also making it monochromatic so it wasn’t as busy with the previous shades of blue I had going on prior. Luckily spending so much time on drafting a design led to a fairly smooth progress to my final iteration.

Technical Detail

Instantly I struggled a bit in illustrator to make the “C” ring exactly how I wanted it to be. I ultimately found how to make a 3D torus using the 3D tools within the program and used that as a template to trace over with using spheres. Playing with the pathfinding and shapebuilder tools, I was able to whittle away a design I was happy with, and then mirrored half of it to ensure it was symmetrical.

As for the spaceship, it was much more straight forward to make. Using an assortment of rectangles, I stretched and layered them to make the desired object. Making the trails was slightly difficult as it at first didn’t want to play too nicely with the ring I made when cutting it with the pathfinding tool. Eventually all came to fruition however and ended up with a logo I’m proud to share!

Sources and Materials

All images used were created from scratch.